Tuesday 16 July 2013

Nail Art: Red Elegance

Hey Everybody....
How are you all doing today?

Today I have a Nail Art for you all.

Its a pretty easy to do nail design nothing too difficult but I thought to share this with you all anyway and maybe give you some idea for your nail manicure...and also many of you like these kind of basic simple nail design :)

Finished product in Daylight

So without further me rambling on and on let's get started.....


For this nail art design you'll need:


-Any nail color of your choice -I used Red Nail polish

-White Nail Polish

-Tape

-Toothpick

&

-Top Coat

Things you need


The Process :)

1)Put tape on the top half on your nail.

Applying Tape to nail


2) Apply Red polish on the bottom of your nail .

Apply red to tips


3) Remove the tape after few seconds,
-don't worry if you get some polish like i did on you skin just soak up some cotton swab in nail polish and clean the edges:) 
or sometimes it get clean off while taking a shower ;)

Remove the tape


4)Now get ready with your white polish with a toothpick and add one line of tiny whites dots across the nail :)

Adding Dots


6) Add the top coat


And you are Done -
 super simple easy to do yet elegant nail design.

Final Product without Flash
Without the Flash inside the Home 

Finish Product with Flash
With Flash inside the Home:)

I wore this manicure on a wedding- hence the red color but seriously this combination would look good on any occasion or a party
and
 if you want to change the base color be my guest :) and play up with the design -
Did you try this design.... tweet  me the picture so i can see your creation...

That is about you beautiful little angles:) 

In the comment below let me know what you thought about this post 
Liked it or NOT
 ...spill it outty:) 
You know I appreciate any feedback 

Have any recommendation or suggestion for me for my next post that you want me to do ...??? 
Leave them all down in the comment section and I will try my level best to act on them.

Till then you take care my lovelies...
I'll see you very very soon....

♥♥♥ 

And dont foget to Share as sharing  is Caring
:) 

Love you all.
xx


Tuesday 9 July 2013

Review: Banana Boat Sun Protection UVA & UVB- SPF 50

Heyllo you all,how are you all doing today? Hope fancy shamcy :) ...

Today I have a  Banana Boat Sun Protection UVA & UVB review for you all that I wanted to do since joining the blogger community.

In the beginning of watching YouTube videos I also got introduce to the very lovely Sunscreen-

I never knew how much damage can sun cause our skin and how much important role sun block play in protecting our skin.

So when I got all the information I ran to my nearest market and grab a Sun screen with the highest SPF that was available. 

For beginning I didn't research before buying this product I didn't know any better really

The Banana Boat Sun Protection UVA & UVB-SPF50 -water resistant' claims to be ; Fragrance Free
                                                                             Aloe Vera and Vitamin E
                                                                               Non-Greasy.

 Banana Boat Sun Protection UVA & UVB Packaging

Before starting-Please take this review of mine with the grain of salt as i am only telling my experience with this product if this works for you then
great I wish I could say the same:(

Lets start off with the con as there are alot more of them then the pros ekk....

The very first problem I have with  Banana Boat Sun Protection UVA & UVB is that its not non greasy.

I have oily/acne prone skin and this product make me super oily even if I apply the littlest amount of it .

The first time I applied this product I was a bit generous with it and after the application I looked like greasy ball or I might add a disco ball or a butter stick.
Seeing myself in the mirror like that I got a bit panicky ,washed my face right after the next second.

The second day I tried this product fearfully & carefully ,a pea size amount still gave the same shiny result but a little mild tone.
To combat the shine I applied a Baby powder to my skin and it was all better than before.The powder really muted the shine and I was up and away for 
my routine day at school.

I used this product for a week then the same technique pea size amount of product and baby powder.

But low and behold I started noticing that my skin wasn't feeling good anymore and was getting irritated now which is not very pleasant as we all know
and the I started to break out. And that was it from my side.


Then thirdly this is not fragrance free, and has a very strong sun screen smell to it which i am not a fan of.

Fourth con of this product is that well this might disgust some of you and if this happens with other sunscreen please let me know so i know its not this product 
fault but if it doesnt then it should be totally pointed out.In my Opinion it should so here am I mentioning it.

The Banana Boat Sun Protection UVA & UVB gets clogged up and by clogged up I mean
get around the nozzle and get in this awful gooey consistency and that is even without using it so if you use it of course it will get all over the bottle opening 
and its just not pretty to use. 

You can see in the picture below what I mean to say and this is after 2 month of not using it- I really don't know how it gets all over the place.
 Banana Boat Sun Protection UVA & UVB clogged up opening

So first you have to clean the product that is stuck around the bottle opening and then use it.

Who in the world has time for that...Not me or anyone actually.

Seriously the experience with this Sun Screen has scared me away from using sun block.

But that could be just this one . I have never used any other sun screen so I cant really compare this with anything but truly and honestly if all sunscreen are                                                                              
like this than I am not happy bird at all. 
 Banana Boat Sun Protection UVA & UVB opening clogged up different camera angle


I still use this from time to time as i don't like wasting my money but as soon as I come home this gets off my face right away.

I do feel bad giving bad review about a product but I needed to share this with you guys....

The only thing I can say good about the Banana Boat product will be -the cute squeezy tube packaging as you don't really waste any product in here and then it protects  from the sun . 


And that is all my dear friends.


Hope you found this review helpful and informative.


See you all soon .


Till then take care


Love you all 


PS. dont forget to let me know in the comment below if the clogged up thing this products does- did this ever happened to you too....???


Dont you dare to forget to Share this.....Now me really off bye:)


Saturday 15 June 2013

Review :Genny High Fashion Cosmetics Nail Polish

Another day another nail polish review from my side but what can I do?
I just love nail polish in general & if I had the money I would have the entire nail color collection at my home and just paint off my nail all the time.

Oh well ...let start with this Nail Polish Review .

Today nail polish is from a brand Genny-High Fashion Cosmetics, I never heard about this brand from any other beauty gurus so why not mention something that is worthy of a notice in my opinion  :)

Packaging of Genny Nail Polsih

I bought this nail polish while I was on my hunt for the perfect baby pink/pastel color polish which i found actually & you want you can check out my review on that nail polish right here :


But while I was looking around here and there this glittery fabulous nail color caught my eye. 

I got Genny Nail Polish in the color 510, the nail polish consist of maroon/red,silver glitter in it -which are all of my favorite. 

The opacity of this nail polish is cray cray you guy....you just need 1 coat of this and BAM there you have it million of shinning stars on your nails.

The below picture to be honest doesn't even do justice to the shine and sparkle this nail polish provides.
Its remarkable,I feel like a fairy dust when I have this on my toes and fingers so so pretty to look at. A total attention grabber to be honest.

close up picture on the nail polish glitter in the sunlight
With the sunlight beaming on my nails
The time Genny-High Fashion Cosmetics Nail Polish takes to dry is 10 min to the max that is and after that its all set.

The Lasting day -goes to 3 day but if you want to stretch it it can go up to 5 days.

Close up on the nail polish without the sunlight
In the daylight

The good thing about the Genny Nail Polish is that the removal process of this polish is quite fast ,compare to other glitter nail polish that I have tried. 

You don't need to scrub away your nails for hours to remove the polish, as we all glitter polish lover knows how much of a hassle it takes to get the glitter off your nails.

And that is about it you guys for this polish.......

Now the question is ...

Would I Recommend Genny-High Fashion Cosmetics Nail Polish to anyone ??? Hell double triple YES...

I truly love this nail polish and am so very interested to try out different colors from this brand also try other products from them too.

You tell me have you tried or ever heard of this brand ? 
Or is it new to too as it was for me?

Let me know in the comment below , you know I read them and  also respond....

If you like these kind of reviews on different product ,let me know so that i know i am on the right track you guys...

Till then 
Share. Follow. Comment 
and I'll see you all
 on...........

21.June.2013 yep setting myself for another date....hehehe...this make me remember when i have to post my next blog post 
Trying to be consistence you see...;)


Friday 15 March 2013

DIY Candle Jar : Jar On FIRE


FINISH CANDLE JAR  PICTURE


This week post is super exciting for me to share with all of you and to be honest I am quite proud of it 
&

It’s a DIY…..and who doesn’t like DIY …right??

As per usual like any of my other DIY post this also is going to be an 


easy peasy, 


fun to do


 and


  …I hope you try it out for yourself.

So without any further ado shall we get started then….?!?! YES I think so…


For this Design -

Things you’ll need


1)      An empty candle jar


2)      PVA Glue


how it should look like....:)

3)      Acrylic paint


4)      Ink Paint


5)     Brushes

•Angled brush


•A Fan brush

OPTIONAL- JUST TO PAINT THE BASE
NEATLY AND NICELY.


•Spiky/ rough Old bristle brush


That’s it for what you need ..lets get to  


What you need to do …☺


1)      Get your plain boring candle jar ready-

Washed and Dried ☺

Candle Jar


2)      With your PVA/German Glue and angled brush start making small clumping strokes on your candle jar and repeat the pattern throughout the jar.


Applying PVA to the candle jar


Applying PVA Glue to the jar

applying glue to the bottom of the jar
THE BASE

Let the PVA glue dry and repeat this process 3 to 4 time 

Applying another PVA glue to the jar

Till you get the chunky texture throughout your jar.

after the glue dries


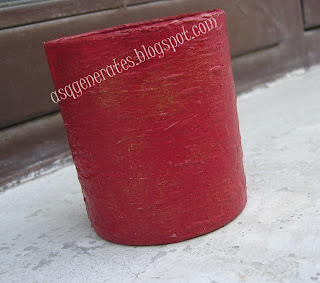
3)      Now paint on the jar with a crimson/red acrylic paint.

crimson red paint


Applying red crimson paint to Jar


4)      After your paint dry  then it’s time to add some gold sparkle – Get your spiky old brush -blot the gold paint around a tissue to get the excessive off and then gently rub it very lightly but roughly  against the jar

Apply gold paint sparingly on the jar to add texture


5)      Finish off by sealing in your design with getting some PVA glue mixed in water and apply it around the jar for that glossy touch.


And that is all . 


Put your candle in there and LIGHT it up ☺


RESULT IS DOWN BELOW 


PS. I HAVE TAKEN LOADS OF PICTURE .... AS I WAS HAVING FUN TAKING DIFFERENT ANGLES OF THE JAR.


&


I WANTED TO SHARE THESE  WITH YOU ALL.. SO HERE WE GO......


DIY Candle Jar : Jar On FIRE in daylight
DAYLIGHT:)


DIY Candle Jar : Jar On FIRE in sunlight
IN THE SUN....

DIY Candle Jar : Jar On FIRE in the dark


DIY Candle Jar : Jar On FIRE in the dark with candle light up inside


DIY Candle Jar : Jar On FIRE detail with flash light


DIY Candle Jar : Jar On FIRE detail without the flash


DIY Candle Jar : Jar On FIRE detail of the jar


DIY Candle Jar : Jar On FIRE different angle of the jar


DIY Candle Jar : Jar On FIRE reflection,playing with the photography

DIY Candle Jar : Jar On FIRE dark environment with candle lit up insdie


DIY Candle Jar : Jar On FIRE final picture with other decoration pieces and candle


Take Care you all....


Hope you enjoyed this post as much i had fun doing it. 


See you real soon.


Till then 


Share. Follow. Comment.


Muah.....


Sunday 10 February 2013

VALENTINE NAIL ART :Half Moon Polka Dot Manicure :)


Hi you guys…..hope you all are doing well and enjoying this year to the fullest.

Today I am so excited to bring you some easy to do Valentine Nail Art….
It’s simple, cute and very valentine like.…..

Hope you like this design and try it out. 

So lets get started with this design:


Half Moon Polka Dot Manicure

Things you’ll need:


Things you'll need

1)      Base Coat

2)      Bubblegum colour nail polish – for the base colour

3)      White nail polish - for the half-moon tip

4)      Stencil with the half -moon shape

5)      Toothpick

6)      Top coat- for that finish touch.

 Lets start with the process shall we?


1)      Paint your base coat first.

2)      Paint your nail the bubblegum pink or any pink you like…

Bubblegum color nail polish


3)      Get your stencil and try to put it right in the middle of your nail.

Nail stencil in the middle of the nail


4)      Paint on white nail polish on the tip and remove after few seconds:)

White tip

Remove the nail stencil from the middle


5)      Get your toothpick ready and make 5 little dot on the edge the white line-you can see in the diagram below 

Put 3 dots starting from edge but leave space ( I don’t think I am explaining this right am I?) - 
put alternating dots like in the picture below 
 hoping you understand by what I mean….

Nail Pattern

Half Moon Polka Dot Manicure -close up


6)      Repeat the the design on all the nails & finish  off with the clear top coat and 
you are done….

Your cute easy to do Valentine Inspired Nail Art Manicure is complete…

Half Moon Polka Dot Manicure -Nail Art photograph


Half Moon Polka Dot Manicure -different angle picture

Half Moon Polka Dot Manicure picture

Hope you would try this on…..

If you try this design out please send me a picture through twitter or Facebook or Pinterest….i would love to see your take on this design.


Till then take care and stay tune for some more fun nail art in the very near future for the 
Valentine Theme….

….now me off to take this nail art off….and try to create some other nail art and hopefully share it with you all…..

Muah….


Related Posts Plugin for WordPress, Blogger...