Showing posts with label Inspiration. Show all posts

Sunday, 10 February 2013

VALENTINE NAIL ART :Half Moon Polka Dot Manicure :)


Hi you guys…..hope you all are doing well and enjoying this year to the fullest.

Today I am so excited to bring you some easy to do Valentine Nail Art….
It’s simple, cute and very valentine like.…..

Hope you like this design and try it out. 

So lets get started with this design:


Half Moon Polka Dot Manicure

Things you’ll need:


Things you'll need

1)      Base Coat

2)      Bubblegum colour nail polish – for the base colour

3)      White nail polish - for the half-moon tip

4)      Stencil with the half -moon shape

5)      Toothpick

6)      Top coat- for that finish touch.

 Lets start with the process shall we?


1)      Paint your base coat first.

2)      Paint your nail the bubblegum pink or any pink you like…

Bubblegum color nail polish


3)      Get your stencil and try to put it right in the middle of your nail.

Nail stencil in the middle of the nail


4)      Paint on white nail polish on the tip and remove after few seconds:)

White tip

Remove the nail stencil from the middle


5)      Get your toothpick ready and make 5 little dot on the edge the white line-you can see in the diagram below 

Put 3 dots starting from edge but leave space ( I don’t think I am explaining this right am I?) - 
put alternating dots like in the picture below 
 hoping you understand by what I mean….

Nail Pattern

Half Moon Polka Dot Manicure -close up


6)      Repeat the the design on all the nails & finish  off with the clear top coat and 
you are done….

Your cute easy to do Valentine Inspired Nail Art Manicure is complete…

Half Moon Polka Dot Manicure -Nail Art photograph


Half Moon Polka Dot Manicure -different angle picture

Half Moon Polka Dot Manicure picture

Hope you would try this on…..

If you try this design out please send me a picture through twitter or Facebook or Pinterest….i would love to see your take on this design.


Till then take care and stay tune for some more fun nail art in the very near future for the 
Valentine Theme….

….now me off to take this nail art off….and try to create some other nail art and hopefully share it with you all…..

Muah….


Monday, 24 December 2012

Holiday Nail Art Part 2-Christmas Tree Inspired:)

Here is another super easy to create Nail Art design for you all.

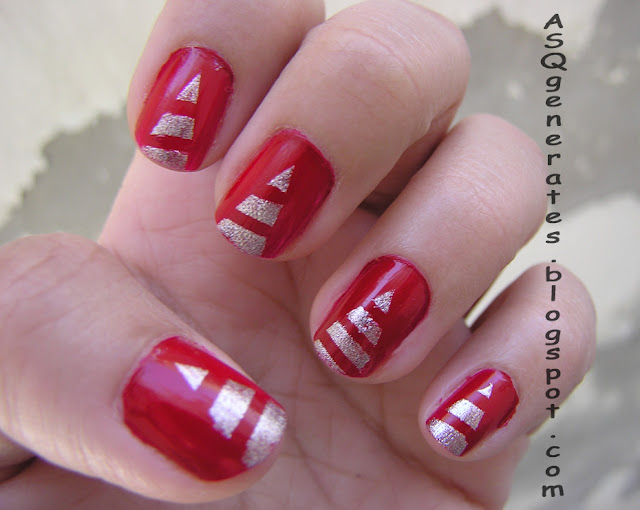
In this nail art I attempted to make Christmas trees that are easy to create and look intricate and unique.
I was very well happy with how it came out to be and wanted to share it with you, so here we go.


Step 1

Paint your nail with 2 coats of solid red colour.

rPaint the nail red color


Step 2

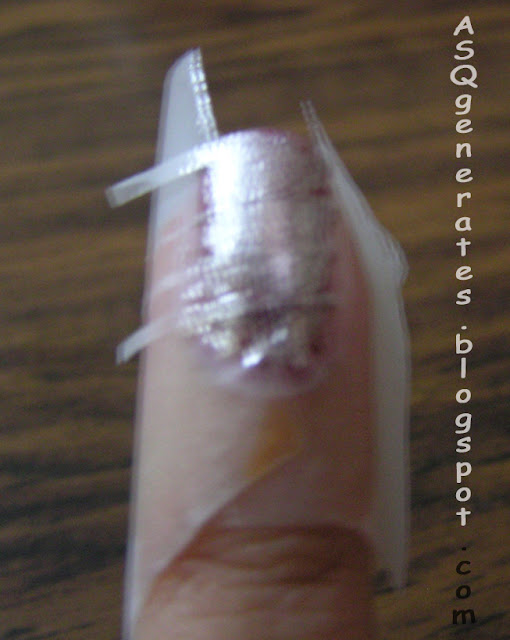
Start taping your finger ; just like the image below.

Create a tree like shape with tape on the nail


a) First put two tape on the side forming a triangle in the middle of your nail.

b)Then cut small line from your tape and place them across the triangle that you created leaving some space in between.


Step 3

Paint your finger with silver nail polish or any other combo you want .
Then peel off the tape after few seconds, but don't let it dry.

Paint on with a silver nail polish


After that Let the design dry off and finish off with a clear top coat.

And there you have your Christmas tree nail Art.

Super Easy yet Festive & Sparkly.


Remove the tape,apply top coat


 ……Hope you all have a lovely Holiday 

And enjoyed this design of mine and give it a try 
Share your recreation with me on my twitter  or on my facebook page 

Take Care.

see ya later....

Monday, 8 October 2012

Niki de Saint Phalle - “Nanas” Inspired Plastic Bag


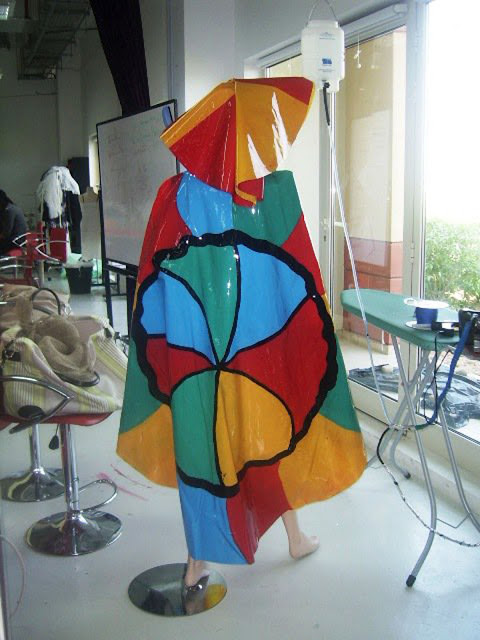
When I was in studying fashion designing we had an exhibition -in which we had to be inspired by our own chosen artist and design and outfit using any kind of material as we wished.

I chose Niki de Saint Phalle - “Nana's Sculpture.
The bright bold colour just made me attracted toward the “Nanas” and I ran with the idea of using Plastic and Acrylic paint.

Now when I was designing this outfit that you can see below
…..I thought in my head on how this design would look on a bag/pouch/ make-up bag/ “anything you want and can put in it bag"-and as I had plenty of plastic left from my exhibit class I thought why not…let try this ….and I am so glad that I did….because I am in love.


Niki de Saint Phalle - “Nanas” inspired clothes


Niki de Saint Phalle - “Nanas” inspired clothes back view


As much as I loved my outfit we all know and can see its not a wearable look (its more or a creative work)….but you can surly use this baby up with anything
 I am really happy with the turn out and hopefully you also found it cute and carry-able. 


Niki de Saint Phalle - “Nanas” Inspired  Plastic Bag

the cute opening  <<<<<THE CUTE BUTTON

Niki de Saint Phalle - “Nanas” Inspired  Plastic Bag back view


It goes to show that when you have some creative idea in your mind and you’re not so sure that would it work out….it’s no harm in trying it out and experiment with your imagination it might turn out better than you imagined it and if it doesn't…..Don’t be hard on yourself and keep trying without quitting.

“You can’t always get what you want, but if you try sometimes, you might find, you get what you need”                        
                                           By The Rolling Stones.

Hope you all like this post and found it creative, enjoyable and pushed you to try out whatever the creative idea that is in your head and experiment with it. :) you might be surprised with it too,just like me…..
Take care guys….

Mauh.

See ya very soon.

Leave me a comment below.I love reading them.


Related Posts Plugin for WordPress, Blogger...