Showing posts with label Nail Art. Show all posts

Tuesday, 16 July 2013

Nail Art: Red Elegance

Hey Everybody....
How are you all doing today?

Today I have a Nail Art for you all.

Its a pretty easy to do nail design nothing too difficult but I thought to share this with you all anyway and maybe give you some idea for your nail manicure...and also many of you like these kind of basic simple nail design :)

Finished product in Daylight

So without further me rambling on and on let's get started.....


For this nail art design you'll need:


-Any nail color of your choice -I used Red Nail polish

-White Nail Polish

-Tape

-Toothpick

&

-Top Coat

Things you need


The Process :)

1)Put tape on the top half on your nail.

Applying Tape to nail


2) Apply Red polish on the bottom of your nail .

Apply red to tips


3) Remove the tape after few seconds,
-don't worry if you get some polish like i did on you skin just soak up some cotton swab in nail polish and clean the edges:) 
or sometimes it get clean off while taking a shower ;)

Remove the tape


4)Now get ready with your white polish with a toothpick and add one line of tiny whites dots across the nail :)

Adding Dots


6) Add the top coat


And you are Done -
 super simple easy to do yet elegant nail design.

Final Product without Flash
Without the Flash inside the Home 

Finish Product with Flash
With Flash inside the Home:)

I wore this manicure on a wedding- hence the red color but seriously this combination would look good on any occasion or a party
and
 if you want to change the base color be my guest :) and play up with the design -
Did you try this design.... tweet  me the picture so i can see your creation...

That is about you beautiful little angles:) 

In the comment below let me know what you thought about this post 
Liked it or NOT
 ...spill it outty:) 
You know I appreciate any feedback 

Have any recommendation or suggestion for me for my next post that you want me to do ...??? 
Leave them all down in the comment section and I will try my level best to act on them.

Till then you take care my lovelies...
I'll see you very very soon....

♥♥♥ 

And dont foget to Share as sharing  is Caring
:) 

Love you all.
xx


Sunday, 10 February 2013

VALENTINE NAIL ART :Half Moon Polka Dot Manicure :)


Hi you guys…..hope you all are doing well and enjoying this year to the fullest.

Today I am so excited to bring you some easy to do Valentine Nail Art….
It’s simple, cute and very valentine like.…..

Hope you like this design and try it out. 

So lets get started with this design:


Half Moon Polka Dot Manicure

Things you’ll need:


Things you'll need

1)      Base Coat

2)      Bubblegum colour nail polish – for the base colour

3)      White nail polish - for the half-moon tip

4)      Stencil with the half -moon shape

5)      Toothpick

6)      Top coat- for that finish touch.

 Lets start with the process shall we?


1)      Paint your base coat first.

2)      Paint your nail the bubblegum pink or any pink you like…

Bubblegum color nail polish


3)      Get your stencil and try to put it right in the middle of your nail.

Nail stencil in the middle of the nail


4)      Paint on white nail polish on the tip and remove after few seconds:)

White tip

Remove the nail stencil from the middle


5)      Get your toothpick ready and make 5 little dot on the edge the white line-you can see in the diagram below 

Put 3 dots starting from edge but leave space ( I don’t think I am explaining this right am I?) - 
put alternating dots like in the picture below 
 hoping you understand by what I mean….

Nail Pattern

Half Moon Polka Dot Manicure -close up


6)      Repeat the the design on all the nails & finish  off with the clear top coat and 
you are done….

Your cute easy to do Valentine Inspired Nail Art Manicure is complete…

Half Moon Polka Dot Manicure -Nail Art photograph


Half Moon Polka Dot Manicure -different angle picture

Half Moon Polka Dot Manicure picture

Hope you would try this on…..

If you try this design out please send me a picture through twitter or Facebook or Pinterest….i would love to see your take on this design.


Till then take care and stay tune for some more fun nail art in the very near future for the 
Valentine Theme….

….now me off to take this nail art off….and try to create some other nail art and hopefully share it with you all…..

Muah….


Monday, 31 December 2012

New Year Nails Art....:)


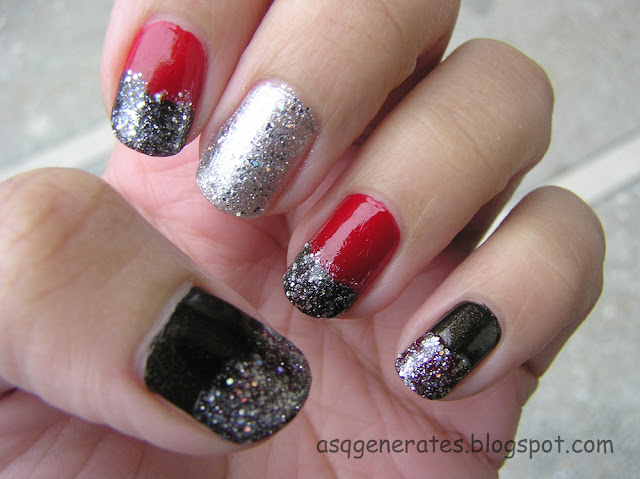
So here am I with a New Year inspired Nail Art that is super easy for the beginners in nail art department Its….Super Sparkling, Glittery, and Twinkly.


If you want to know how I created this nail art then keep on scrolling down and I will tell you everything:) 


New Year Nails Art finished product


For this Nail Art I incorporated the color that I think goes with the New Year eve Reds…Blackss…and Silver…J


Step 1:


I painted my thumb and Pinky finger a black colour which has these tiny gold shimmer:)

My Index Finger and the ring finger blood red colour :)
Then paint my Middle finger with a shimmery silver colour.

Red,Black and Silver painted nails


Step 2:


Starting from the pinky finger get a tape or you can get these french tip nail stencil and put that right in the middle of your nails:)

This step goes for all of your nail except the middle finger...leave that alone.


Note: You can skip this step and just eyeball the next step-this is just to make things easier.


Black polish nail with stencil


Red polish nail with stencil
Add caption

Step 3:
Now paint the tip of your nail with the opposite colour i.e. 
Red Base--Black shimmer tips 
Black Base-Red tips
After 2 to 3 seconds remove the tape/stencil.

Black tip on the red base


Black tip on the red base
The result you get after removing the tape:

after the stencil is removed


Step 4:

Now come the fun step- Applying glitter --on each and every nail tip
&
cover the Middle nail whole with glitter

Apply glitter on the tips

applying glitter on the tips

Don't forget to Finish this design with a Clear Top Coat as you need it for this one....to just make thing look merged in well....
It looks better this way....and polished looking...:)


New Year Nails Art showing off the glitter in different light

Hope you all like this & give it a try and rock this on….
And may this coming year bring lots of joy in your life and may you shine just like these nails and even more….

HAPPY NEW YEAR 2013 You all…


Monday, 24 December 2012

Holiday Nail Art Part 2-Christmas Tree Inspired:)

Here is another super easy to create Nail Art design for you all.

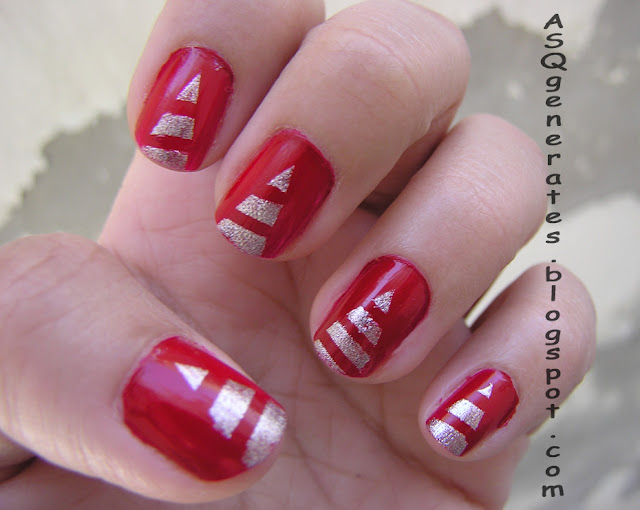
In this nail art I attempted to make Christmas trees that are easy to create and look intricate and unique.
I was very well happy with how it came out to be and wanted to share it with you, so here we go.


Step 1

Paint your nail with 2 coats of solid red colour.

rPaint the nail red color


Step 2

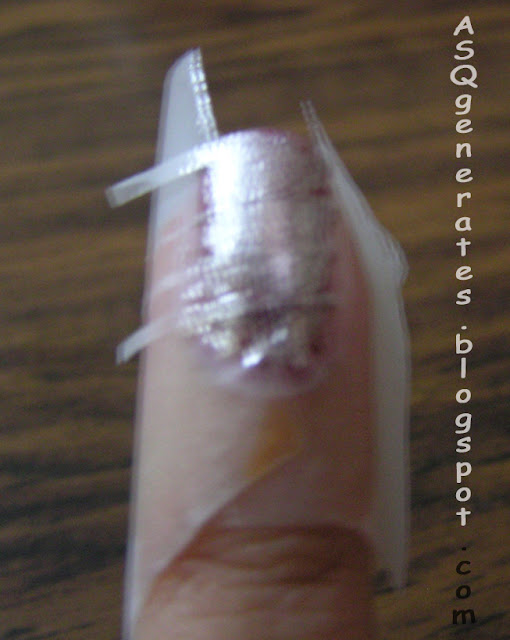
Start taping your finger ; just like the image below.

Create a tree like shape with tape on the nail


a) First put two tape on the side forming a triangle in the middle of your nail.

b)Then cut small line from your tape and place them across the triangle that you created leaving some space in between.


Step 3

Paint your finger with silver nail polish or any other combo you want .
Then peel off the tape after few seconds, but don't let it dry.

Paint on with a silver nail polish


After that Let the design dry off and finish off with a clear top coat.

And there you have your Christmas tree nail Art.

Super Easy yet Festive & Sparkly.


Remove the tape,apply top coat


 ……Hope you all have a lovely Holiday 

And enjoyed this design of mine and give it a try 
Share your recreation with me on my twitter  or on my facebook page 

Take Care.

see ya later....

Wednesday, 19 December 2012

Nail Art : Inspired by Holidays

Hey everyone

Hope you all are having a fabulous day where ever you are….

 As a girl who loves doing nails but is not that great at nail art - when I see other people do their nailart with intricate design I feel so jealous of them wishing to have their talent or to have a budget to go to a professional.

But looking on the brighter side this made me inspired to create a pretty but simple and easy to do festive design.

I love it and thought some of you beginners who find nail art a pain but want to do something different with your nails will enjoy this as much as I did.

Now without further of me blabbering please go ahead and check the nail art out…..AND hey tell me if you like them ?


red and white nail polish nail tutorial

Things you will need:)


1)Red Nail Polish
2) White Nail Polish
3) Toothpick

that is it...it can't get any simpler;) 


Step 1: Paint your nail with a solid red nail polish.
         
Paint nail red color


Step 2: Grab the toothpick and your white nail polish.

Grab white nail polish and toothpick


Step 3: Dip the toothpick in your white nail polish.

Dip toothpick in white nail polish


Step 4: Put small dots with the toothpick mainly on your nail tip and a little bit upwards.

Create white dot on the tips


Step 5: Fill your ring finger with lots of dots,as your accent finger .

Ring finger the accent finger


Ring finger with lots of white dots
CLOSE UP OF THE ACCENT FINGER:)

Wait for the design to completely dry off so that you won't smudge the design and top of the design with your favorite Clear Top Coat to seal in the nail art. 

And there you go your Holiday Nail Art Design is ready in front of you:)


Apply top coat


Holidays Nails final look


Holidays Nails close up

Try this out and tweet me your picture @ASQgenerates I would love to see your take on it. 

Till then take care see you all very very soon:)

Love you all for taking the time out of your day and reading my blog it truly means a lot…..

Thank you.:)
Related Posts Plugin for WordPress, Blogger...